How to Care for Spider Plant. Welcome to our comprehensive guide on caring for the popular indoor plant, spider plant. Whether you’re a seasoned plant parent or a beginner, our easy-to-follow tips and tricks will help you nurture these air-purifying wonders with confidence and success. In this guide, we will cover the basics of spider plant care, including lighting, watering, fertilizing, pruning, propagation, and troubleshooting common issues.
Key Takeaways
- Spider plants are low maintenance, resilient houseplants known for their cascading foliage and spider-like offshoots.
- Spider plants prefer bright, indirect light conditions and can tolerate low light.
- They prefer evenly moist soil and occasional fertilization during the growing season.
- Spider plants are easy to propagate and make excellent housewarming gifts.
- They are known for their air-purifying qualities and can help remove toxins from the air.
Understanding Spider Plants
Welcome to our comprehensive guide on caring for spider plants! Before we dive into the essential elements of spider plant care, let’s take a closer look at these fascinating plants.
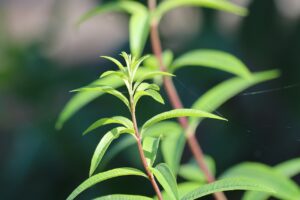
Spider plants, scientifically known as Chlorophytum comosum, are resilient, versatile, and low-maintenance houseplants that are perfect for both seasoned plant parents and beginners.
These plants are native to tropical and southern Africa and are known for their cascading foliage and spider-like offshoots. They can grow up to two feet long, making them an excellent choice for hanging baskets or as an eye-catching centerpiece on a shelf or table.
One of the notable characteristics of spider plants is their ability to purify the air. They can help remove toxins like formaldehyde and xylene, making them an excellent addition to your indoor spaces. Moreover, they are relatively easy to propagate, making them a popular gift choice for friends and family!
What Makes Spider Plants So Special?
| Common Name | Spider plant |
|---|---|
| Botanical Name | Chlorophytum comosum |
| Family | Asparagaceae |
| Light Requirements | Bright, indirect light |
| Watering Needs | Evenly moist soil, slightly drying between watering |
| Temperature Range | 60°F to 75°F (15°C to 24°C) |
| Humidity Tolerance | Average household humidity, appreciates higher humidity |
| Fertilizer Needs | Monthly during the growing season with balanced houseplant fertilizer diluted to half-strength |
| Toxicity | Non-toxic to humans and pets |
Spider plants can tolerate a wide range of conditions, making them perfect for indoor environments. Keeping a close eye on their light, water, temperature, and humidity requirements will help ensure their optimal health and longevity.
Choosing the Right Location
Spider plants thrive in bright, indirect light conditions. Look for a spot near a window where they can receive filtered sunlight throughout the day. Avoid placing them in direct sunlight, as it may scorch their leaves. They can also tolerate low light conditions, but it may slow down their growth.
Temperature and Humidity Requirements
Spider plants prefer temperatures between 60°F and 75°F (15°C to 24°C), which makes them ideal for indoor environments. They can tolerate slightly higher or lower temperatures, but extreme fluctuations should be avoided. Spider plants are adaptable to average household humidity levels, but they appreciate higher humidity. Misting their leaves occasionally can help create a more favorable environment.
Temperature
Spider plants are well-suited to thrive in moderate indoor temperatures. Keep them in a room where the temperature ranges from 60°F to 75°F (15°C to 24°C). While spider plants can tolerate slightly higher or lower temperatures, avoid exposing them to extreme fluctuations, as it can stress the plant and cause damage to its leaves.
Humidity
Spider plants can grow in average household humidity levels, but they prefer higher humidity. A lack of humidity can cause the tips of their leaves to turn brown or develop brown spots. Misting the leaves with water regularly can help to maintain the humidity levels around your plant. Alternatively, you can use a humidifier or a pebble tray to improve the humidity around your spider plant.
By providing your spider plant with the right temperature and humidity conditions, you can help keep it healthy and thriving!
Watering Spider Plants
Watering is one of the most critical aspects of spider plant care instructions. Overwatering or underwatering can harm your plant, so striking the perfect balance is essential.
Spider plants prefer evenly moist soil, so make sure to water them when the top inch of soil feels dry to the touch. It’s best to water them deeply, allowing the excess water to drain out of the pot’s bottom.
Avoid overwatering, as it can lead to root rot, a severe condition that can kill your plant. Ensure proper drainage in the pot to prevent waterlogging. On the other hand, do not let the soil dry out completely as it can cause the leaves to wilt and turn brown. A good way to test the soil is to stick your finger an inch or two into the soil; if it feels dry, it’s time to water.
Water quality is also important for spider plants. They prefer chlorine-free water, so consider using filtered or distilled water. If you have no other option, let your tap water sit overnight before using it to water your plant.
Fertilizing Spider Plants
Spider plants benefit from occasional fertilization during the growing season. Use a balanced houseplant fertilizer diluted to half-strength once a month. Avoid overfertilizing, as it can cause burns on the plant’s roots. During the winter months, reduce or suspend fertilization as the growth slows down.
Tip: It’s essential to follow the instructions on the fertilizer’s packaging carefully. Remember that different fertilizers have different concentrations, and overusing them can be harmful to your plant’s growth.
Propagating Spider Plants
Spider plants are easy to propagate and make excellent housewarming gifts. They produce small offshoots, commonly known as spiderettes, which can be rooted in water or directly planted in soil. Gently detach these spiderettes once they have developed a few roots and plant them in a new pot to create new spider plants.
Before you begin, make sure you have the necessary tools and materials. You will need a clean pair of gardening scissors or shears, a small jar or vase filled with water, and a well-draining potting mix. Keep in mind that the spiderettes must be at least 2-3 inches long before you can propagate them.
Water Propagation
Water propagation is one of the easiest methods to root spiderettes. Follow these simple steps:
- Select a healthy spiderette that has developed a few roots.
- Cut the stem connecting the spiderette to the mother plant using gardening scissors or shears.
- Place the spiderette in a small jar or vase filled with water. Make sure the water covers the roots but does not touch the leaves.
- Change the water every few days and place the jar or vase in a bright, indirect light location.
- Once the roots have grown 1-2 inches long, you can plant the spiderette in soil.
Soil Propagation
If you prefer to root spiderettes directly in soil, follow these steps:
- Select a healthy spiderette that has developed a few roots.
- Cut the stem connecting the spiderette to the mother plant using gardening scissors or shears.
- Fill a small pot with a well-draining potting mix, leaving about an inch of space at the top.
- Make a small hole in the soil and gently place the spiderette and its roots inside.
- Water the soil thoroughly and place the pot in a bright, indirect light location.
- Maintain even moisture levels in the soil and avoid overwatering.
- Once the spiderette has established roots in the soil and shows signs of new growth, you can transplant it into a larger pot.
With these simple techniques, you can easily propagate your spider plants and share their beauty with your friends and family.
Pruning and Trimming Spider Plants
Regular pruning is essential for maintaining the attractive appearance of spider plants. Over time, spider plants can develop long, cascading stems that can make them appear untidy. Here are some spider plant care tips and tricks for pruning and trimming your spider plant:
- Remove any discolored, damaged, or dead leaves by cutting them at the base with a sharp, clean pair of scissors or pruning shears. This will allow the plant to focus its energy on new growth.
- Trim the long, cascading stems by cutting them back to the desired length. This will encourage the plant to produce new stems at the site of the cut, resulting in a fuller, bushier growth habit.
Be sure to sterilize your scissors or pruning shears with rubbing alcohol before and after use to prevent the spread of disease. You can also treat the cut ends of the stems with a rooting hormone powder to encourage new roots to grow, which can then be used to propagate the plant.
Remember that spider plants are resilient and forgiving, so don’t worry if you accidentally trim too much. With proper care, they will bounce back in no time!
Dealing with Pests and Diseases
Spider plants are easy to care for, but they can still attract pests or be affected by diseases. Here are some spider plant care tips and tricks to help you deal with any issues that may arise.
Pests:
Spider mites, mealybugs, and aphids are the most common pests that affect spider plants. Here are some ways to identify and treat these pests:
| Pest | Identification | Treatment |
|---|---|---|
| Spider mites | Look for small, yellow speckles on the leaves. The leaves may also appear dusty. | Wipe the leaves with a damp cloth, and spray with organic insecticidal soap or horticultural oil. |
| Mealybugs | Look for white, cottony spots on the leaves, stems, or flowers. | Scrape off the mealybugs with a cotton swab dipped in alcohol. Spray with organic insecticidal soap or horticultural oil. |
| Aphids | Look for small, pear-shaped insects on the underside of the leaves and stems. They may be green, brown, or black. | Spray with a strong jet of water to dislodge the aphids. Alternatively, spray with organic insecticidal soap or horticultural oil. |
It’s important to inspect your spider plant regularly for any signs of infestation. Early detection and treatment can prevent the pests from spreading to other plants.
Diseases:
Spider plants are relatively resistant to diseases, but they can still be affected by fungal infections or rot. Here are some ways to identify and treat these issues:
| Disease | Identification | Treatment |
|---|---|---|
| Root rot | The leaves may turn yellow or brown and wilt. The roots may appear black or mushy. | Remove the affected plant from the soil, wash the roots, and trim any rotting parts. Repot in fresh soil, and avoid overwatering. |
| Fungal infections | The leaves may develop spots or patches. The plant may also have a musty odor. | Remove the affected plant from other plants, remove any infected leaves, and improve air circulation and lighting. Spray with a fungicide if necessary. |
Proper care and maintenance, such as avoiding overwatering and providing adequate light and humidity, can help prevent diseases and pests from affecting your spider plants.
Potting and Repotting Spider Plants
Spider plants prefer slightly crowded conditions, so repotting is usually required every two to three years. Choosing the right potting mix and a new container that is slightly larger than the current one can help your plant thrive.
| Step | Instructions |
|---|---|
| Step 1 | Gently remove the plant from its current pot and loosen the root ball with your fingers. |
| Step 2 | Place your plant in the new pot and fill it with fresh, well-draining potting soil. Make sure to leave enough space at the top of the pot for watering. |
| Step 3 | Water your newly repotted plant thoroughly and place it in a bright, indirect light location. |
| Step 4 | Avoid burying the plant too deep in the soil, as it can lead to root rot. |
Remember to water your newly repotted plant slightly less than usual until its roots have adapted to the new environment. Spider plants thrive in slightly dry conditions, so avoid overwatering to prevent root rot and other problems.
Fertilization is not necessary immediately after repotting, as the fresh soil should contain enough nutrients for your plant to grow. Wait for a month or two before resuming fertilization.
Repotting your spider plant can help it grow larger and healthier, but make sure not to disturb the roots too much, as it can cause stress to the plant.
Spider Plants and Their Air Purifying Abilities
Did you know that spider plants are not only easy to care for but also natural air purifiers? These houseplants have been shown to effectively remove harmful toxins from the air, making them a great addition to any indoor environment.
Spider plants are particularly effective at removing formaldehyde, a common indoor pollutant found in many household items such as carpets, furniture, and cleaning products. They also have the ability to remove xylene, a chemical found in printing and rubber products.
The best way to maximize the air purifying benefits of spider plants is to group several together. This creates a mini green oasis that works to naturally purify the air around you. You can also pair spider plants with other air-purifying plants such as snake plants and peace lilies for added effect.
Tips for Maximizing Air Purification Benefits
- Group several spider plants together to create a mini-green oasis
- Pair spider plants with other air-purifying plants such as snake plants and peace lilies for added effect
- Place spider plants in areas where formaldehyde and xylene may be present, such as near carpets and cleaning products
- Regularly dust and wipe down spider plant leaves to keep them clean and functioning at their best
By following these simple tips, you can enjoy both the aesthetic and air-purifying benefits of spider plants in your home or office.
Common Spider Plant Varieties
Spider plants come in various cultivars, each displaying unique foliage patterns and colors.
| Variety | Description |
|---|---|
| Vittatum | The classic green and white striped spider plant, known for its air-purifying qualities and easy care. |
| Bonnie | The curly-leaved spider plant, featuring uniquely shaped leaves that make it a standout addition to any plant collection. |
| Hawaiian | The solid green spider plant, offering a simple yet elegant look that blends well with any home decor. |
Other spider plant varieties include ‘Zebra’, ‘Variegatum’, and ‘Fire Flash,’ each with their distinct characteristics that make them a popular choice among indoor gardening enthusiasts. Experiment with these varieties to add visual interest to your plant collection and enjoy their air-purifying benefits.
Spider Plants in Outdoor Gardens
Spider plants, known for their low maintenance and air-purifying abilities, are primarily grown indoors. However, they can thrive in outdoor gardens in mild climates with partial shade and protection from direct sunlight. Adequate moisture is crucial, especially during hot and dry weather, as spider plants prefer evenly moist soil. Mulch around the base of the plant to retain moisture and deter weeds.
Spider plants can tolerate occasional light frosts, but it is best to protect them during colder months. Cover them with blankets or move them indoors to avoid frost damage. Additionally, spider plants in outdoor settings are more susceptible to pests and diseases, such as spider mites and root rot, so regular inspection and care are essential to ensure their health.
Plant spider plants in well-draining soil and avoid overwatering, which can lead to root rot. Regular pruning and trimming help maintain their shape and encourage healthy growth. Spider plants can also benefit from occasional fertilization, especially during their growing season.
In summary, spider plants can add beauty and air-purifying benefits to your outdoor garden with proper care and attention. Ensure they receive the right amount of sunlight, moisture, and nourishment, and watch them thrive!
Troubleshooting Spider Plant Issues
Despite their resilience, spider plants may encounter common issues that affect their growth and appearance. Here are some tips on how to identify and address these problems:
Browning Tips
If the tips of your spider plant’s leaves turn brown, it may indicate over-fertilization or underwatering. To fix this, cut off the affected leaves and adjust your watering and fertilization practices. Remember to water only when the top inch of soil feels dry to the touch and fertilize your plant only once a month with a balanced houseplant fertilizer diluted to half-strength.
Yellowing Leaves
Yellowing leaves are often a sign of underwatering or exposure to temperatures that are too low. Ensure that you water your plant regularly and maintain temperatures between 60°F and 75°F (15°C to 24°C). Additionally, make sure your plant is not exposed to cold drafts or air conditioning.
Stunted Growth
If your spider plant appears to have stopped growing, it may be due to inadequate lighting or a lack of nutrients in the soil. Move your plant to a brighter location with indirect sunlight and fertilize it once a month with a balanced houseplant fertilizer. Make sure the soil is well-draining and replenish it every two to three years by repotting your plant.
By following these simple tips, you can troubleshoot common spider plant issues and help your plant thrive. Remember to observe your plant regularly, adjust your care practices as needed, and enjoy the beauty and benefits of your spider plant.
Conclusion
Spider plants are wonderful additions to any indoor garden, offering beauty and air-purifying benefits. By following our comprehensive guide on how to care for spider plants, you can ensure the longevity of your plant and enjoy its cascading foliage for years to come.
Remember to choose a bright, indirect location for your spider plant, water it regularly without overwatering, and fertilize it occasionally. Prune and propagate your plant as needed, and be mindful of any pests or diseases that may affect it.
Whether you’re a seasoned plant parent or a beginner, spider plants are a delightful choice for any space. Explore the various cultivars available and enjoy the visual interest they add to your indoor or outdoor garden.
FAQ
How often should I water my spider plant?
Spider plants prefer evenly moist soil but can tolerate slight drying between watering. Water your plant when the top inch of soil feels dry to the touch. Avoid overwatering, as it can lead to root rot. Ensure proper drainage in the pot to prevent waterlogging.
How often should I fertilize my spider plant?
Spider plants benefit from occasional fertilization during the growing season. Use a balanced houseplant fertilizer diluted to half-strength once a month. Avoid overfertilizing, as it can cause burns on the plant’s roots. During the winter months, reduce or suspend fertilization as the growth slows down.
How do I propagate spider plants?
Spider plants are easy to propagate and make excellent housewarming gifts. They produce small offshoots, commonly known as spiderettes, which can be rooted in water or directly planted in soil. Gently detach these spiderettes once they have developed a few roots and plant them in a new pot to create new spider plants.
How do I prune my spider plant?
Regular pruning helps maintain the attractive appearance of spider plants. Remove any discolored, damaged, or dead leaves by cutting them at the base. Trimming the long, cascading stems can encourage a fuller, bushier growth habit.
How do I deal with pests and diseases on my spider plant?
Spider plants are relatively resistant to pests and diseases. However, they can occasionally be affected by spider mites, mealybugs, or aphids. Inspect your plant regularly and take immediate action if you notice any signs of infestation. Treat pests with organic insecticidal soaps or horticultural oils to protect your plant’s health.
How often should I repot my spider plant?
Spider plants prefer slightly crowded conditions, so repotting is usually required every two to three years. Choose a well-draining potting mix and a new container that is slightly larger than the current one. Gently loosen the root ball, place your plant in the new pot, and fill it with fresh soil. Avoid burying the plant too deep to prevent rotting.


Pingback: Discover the Intriguing World of Tropical Plant Species